This past March (2013) we landed in the small town of Wetumpka, Alabama to recover from a very expensive week in New Orleans. Oh, and to visit my mom, of course. Luckily for us, her new home has a cement pad in the back yard as well as a double wide gate which allowed us to "camp" basically for free. Nothing like mooching electricity, water and wifi from your family (I highly recommend it).
After 5 months on the road we were in desperate need of a purge. On top of that, I really wanted to change a few things out. Our RV was completely unmodified...we were living with what was once white "wall -to-wall" carpet, burgundy and grey upholstery (everywhere...couch, window treatment, bedspread, bench seats...) and beige walls. It was impossible to find accessories that complimented the pattern on the couch and the interior made us feel like, well, blue-hairs.
 |
| The Mutiny the day we bought it. |
 |
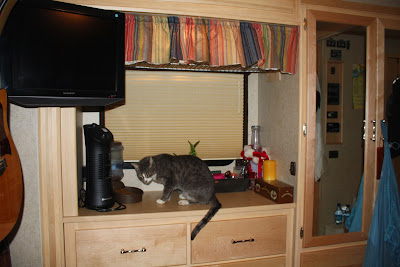
| Avi and Miso are obviously not thrilled with the color of the couch either. |
I knew that I wanted the carpet gone. With a dog and 2 cats (not to mention the husband who spills and leaves crumbs in his wake) carpeting is just a source of extra work and disgusting stains. Whoever thought that putting whitish carpeting in a RV (meant to go CAMPING) really needs to up their meds. It was a nightmare to try to keep clean. Clark was afraid of the amount of work involved in removing the carpet and wanted to put it off however, he did want to remove the dinette and install a desk of some sort.
 |
| Removal of the dinette...and the revelation that the carpet was supposed to be much whiter than what we were used to seeing. |
 |
| Uh, so THAT left a mark... |
 |
| There were about 5,783,691 staples we had to remove. |
So, we removed the dinette. It was an easy task but it became abundantly clear exactly how dirty the carpet was once the booths were removed. Besides, there were hole in the carpet from the bolts and seat belt anchors. It only made sense to rip the carpet out too, right? And, just to make things interesting, we tore {very carefully} all of the window treatments out as well.
 |
| Avi helping supervise the removal of those hideous window treatments. |
As we sat in the RV with bare plywood floors, it started to sink in...what had we done and how are we going to 'fix' this? Having been inspired by the colors of the Texas Gulf Coast and a desire to use as much reclaimed resources as were feasible we set to work on renovation. I used Pinterest to get decorating ideas, color schemes and crafts that could be helpful in 'thinking outside of the box'. But one thing we both settled on was the flooring...brand new Luxury Vinyl Planking from Lowes.
 |
| For those wondering...we did NOT remove the carpeting from under the couch and bed. We just weren't sure how to do it so we cut it back as far as possible. In retrospect, we probably should have figured out how to disassemble the couch and do it "right". |
Being in the Montgomery area turned out to be a great location for Flea Markets, consignment shops and antique stores. The prices were very reasonable, especially compared to what we had seen in California {it's amazing the people will pay $100's of dollars for old crap in Cali when you can buy it for like $10 in Alabama}. We found our new desk at a local consignment shop. In it's previous life it was a kitchen table on a farm in West Virginia.
.JPG) |
| Our new desk! Large enough to eat dinner at, serve as a computer work space, sewing center...the possibilities are endless!! |
 |
| "New" desk chair found at the Salvation Army...cost $5. |
 |
| Salvation Army desk chair with a face lift. Painted cobalt blue and the 'distressed'. Here you can also see the Luxury Vinyl Flooring installed. |
As you can see, we decided that with the carpet gone this would be the best time to paint the walls. Let's add another major project!! I did quite a bit of research and decided that the best way to paint over our vinyl wallpaper was to lightly sand, clean and then use an oil based primer. Had I been more aware of the toxicity of oil based primer I might have researched for a better alternative. But, I didn't, and so that's how our walls were painted. and they have held up beautifully in all types of weather. Clark was in a bit of a hurry to surprise me and painted the bathroom without sanding and priming and that is the one room where the paint has scratched and peeled slightly. He was also unable to get any paint to stick in the corners where there is some sort of adhesive joining the walls. I've had people argue with me (online) that sanding and primer aren't necessary...to those people I humbly disagree and welcome them to come repaint my bathroom.
My mom and I spent hours in the fabric store looking for just the right patterns and colors for curtains and pillow. We ended up purchasing little fabric but found some great deals at Cost Plus World Market on curtains and fabric shower curtains. We cut up the store bought curtains to make custom curtains and pillows for the Mutiny. It was more cost effective than buying bulk material and the consignment stores had been a bust.
We rummaged through my mom's linen closet and storage shed for scrap wood, fabric, pillow stuffing and mason jars. Her community had a neighborhood-wide yard sale in which we were able to sell off all of or recently purged items (as well as the dinette set) and buy a few things to decorate the RV. We recovered old pillows with new fabric, repainted a chair and set of shutters, recovered the padded headboard over the bed, found new sconces for our lights and had a great time finding treasures where ever we could.
 |
| Shutters found for $3.25. |
 |
| We refinished the shutters and hung them over the desk, on either side of our large window and added some hardware so they could serve as storage too. |
|
|
.jpg) |
| Old headboard coming out. |
 |
| Recovering our padded headboard. |
|
 |
| Newly recovered headboard with reclaimed wood and leftover vinyl planks accenting the wall. New curtains and paint too! |
 |
| Before: Our dresser and closet (opposite the bed). The curtain above hides a wire shelf we installed to hold shoes. |
 |
| After: New curtains and paint (sorry for the bad lighting and blurriness). |
 |
| Before: Back wall of the RV in the bedroom |
|
 |
| After: Painted and accent wall and found an amazing print on clearance at Hobby Lobby. It's a Route 66 Great American Road Trip print with guitar...how perfect!! |
 |
| Before: We removed the heavy sliding bedroom door and were left with a boring waste of space. |
 |
| After: New paint and 2 reclaimed barn wood coat racks gave us a bit more handy storage. |
 |
| After: looking down the hall into the kitchen and bedroom. |
 |
| After: Our little bathroom. |
 |
| After: our desk...new paint, window treatment, reclaimed shutters, reclaimed chair, reclaimed storage boxes. |
 |
| After: New paint, couch cover, curtains, scones, recovered old pillows. And all of the furbabies. |
 |
| After: kitchen |
Although there were times when we were stressed about the amount of work we had created for ourselves, we are thoroughly happy with the remodel. We feel more like we are living in a house and less like we are just on an extended vacation. It feels homey and comfortable and not so generic. We gained a lot of room by removing the dinette and I can now practice yoga in either the bedroom or the living room with worrying (too much) about breaking things (myself included).
Even though we ended up tackling more than we had originally intended we did leave a few things undone for a future project (maybe). And we tried not to fill every nook and cranny, knowing that throughout our travels will will probably find things to add to the decor.
I love to see other people's remodels to gain more ideas. Feel free to leave links to your own blogs and/or photos so we can take a peek!Labels: carpet removal, painting, painting vinyl wallpaper, reclaimed, recycle, remodel, renovation, reuse, RV remodel, vinyl planking


.JPG)


.jpg)


